Clinical Online Help
Clinical FAQs
Correspondence
Q
Can I save documents to a Patient’s Record via the Scan/Import
Correspondence window?
A
Yes. If you didn’t assign the document to a patient at the
time you imported/scanned it, you can do so via the Assign
Patient button. Then, click the Store to Patient button to
simultaneously save it to the patient’s record, and remove
it from the Scan/Import
Correspondence window.
Q
Why can’t a user 'action' documents after scanning them?
A
All correspondence scanned/imported via the Scan/Import
Correspondence window flows through to the Holding
File, where the assigned practitioner can then check and
action it accordingly, before storing it to a patient’s record.
Q
Why does a blank page get printed when I print Correspondence?
A
Printing of Correspondence (including Investigation Results)
is linked to the Preview window. Click Full Preview to print
or turn on the preview window.
Q
How do I scan/import a multi-page document?
A
When scanning: To scan a multi-page document, simply keep the
Scan Document window open, and click the Scan button as often
as you need to, to continue scanning. When importing: To add
multiple files to a single page, instead of clicking the Import
button, click the  button instead, and then click Import to Single Item from
the menu that appears. Then, after selecting multiple files
to import (by holding Ctrl as you click each file), the group
of files are added to a single record within the patient's
Clinical Window.
 button instead, and then click Import to Single Item from
the menu that appears. Then, after selecting multiple files
to import (by holding Ctrl as you click each file), the group
of files are added to a single record within the patient's
Clinical Window.
Investigations
Q
How do I setup my pathology request forms in MedicalDirector
Clinical?
A
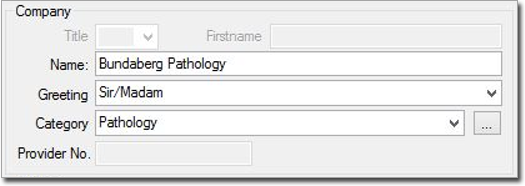
Pathology providers must be added to the Clinical Address
Book first, with a category of 'Pathology'. See Creating
a New Address Book Entry. Enter all relevant information,
including Healthlink EDI if you have it (or you can obtain
it from the Pathology Provider). Save the details.


Q
How do I select whether the company uses a pre-printed form
or not?
A
Close all patient records. Access Investigations
options. Under the Company drop-down list, select a company
(pathology provider) from your Address
Book. Tick the 'Use Standard Pre-printed Form' option.
This allows Clinical to process a Pathology Request on a pre-printed
form from your pathology provider.
Q
What if my pathology provider does not have a pre-printed form?
A
Access Investigations
options. Under the Company drop-down list, select the
company (pathology provider) from your Address
Book. Remove the tick from the 'Use Standard Pre-printed
Form' option. Clinical will produce its own pro-forma with
Provider, Patient Demographics, Test, and Clinical Details
fields, as required.
Q
What happens when the information is mis-aligned, or printing
outside of the area it is supposed to be printing in?
A
Grab a ruler with millimetre increments marked on it, and measure
where the misaligned content is currently printing, starting
from the Top and Left of the page. Make a note of these measurements.
Then, measure to where it should be printing, from
the Top and Left of the page. Adjust your Pathology Request
print measurements via Requests
Print Options. Save the changes. Do a test print to confirm.
Q
Why does the Holding File show the Practitioner’s name multiple
times and/or the Surgery Names.
A
The Holding File
Select Practitioner List is populated with a list of practitioners
that have results that need to be ‘actioned’. The names in
this list are sourced from the recipient of the result, from
the sender of the result, and the name of the practitioner
assigned to the correspondence. It is recommended that you
contact your result provider to ensure they are displaying
your name as you wish it to appear. Once all correspondence
has been actioned for that Practitioner/Name, the name will
no longer appear on the list.
Q
How do I notify a result with the preview turned off?
A
Select the result to be actioned and click Full Preview. This
opens the result, and the action buttons will be made available.
Q
How do I print a list of items marked as Return Urgently?
A
- From the Clinical front screen select Correspondence > Actioned Items to open the Actioned Items window.
- Filter the Date Checked column (select a required date range).
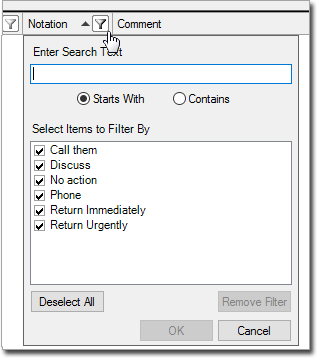
- Filter the Notation column to display Return Urgently only.
- Highlight the results you wish to print, by using the CTRL or SHIFT key (in standard Windows fashion). Alternatively, you can select all items simultaneously by clicking the Select All link.
- Click the Print List button.
Q
Why can I see Results in the Correspondence tab but not in
the Results tab?
A
The results tab has had a filter applied to it. By clicking
the Clear Filters button on the Results tab, all results will
now be visible. The same applies for the Documents and Letters
tabs.
Q
How does a doctor action documents that are in the holding
file?
A
Select Correspondence > Check Holding File. If ‘preview’
is enabled when selecting the result, the action buttons will
be available at the bottom of the screen. If ‘preview’ is
disabled you will need to click Full Preview or double click
to view the result. Once actioned, the next result will be
presented for actioning.
Q
How do I remove unwanted items from the Notation filter in
the Actioned Items window?


A
See 'Managing
the Notation Filter' for instructions.
Searches and Statistics
Q
How to I mark 'inactive' all the patients we haven't seen in
a while?
A
- From the Clinical main window, select Search > Patient.
- Within the Patient Search window, locate and tick the Not Seen Since check box, and indicate the 'last seen' date.
- Click Search.
- It is highly recommended you print this list of patients for reference.
- To mark the list of patients as inactive, click the Inactivate Patients button.